Spark快速入门系列(8) | 在IDEA上编写Spark程序的两种运行方式
大家好,我是不温卜火,是一名计算机学院大数据专业大二的学生,昵称来源于成语—
不温不火,本意是希望自己性情温和。作为一名互联网行业的小白,博主写博客一方面是为了记录自己的学习过程,另一方面是总结自己所犯的错误希望能够帮助到很多和自己一样处于起步阶段的萌新。但由于水平有限,博客中难免会有一些错误出现,有纰漏之处恳请各位大佬不吝赐教!暂时只有csdn这一个平台,博客主页:https://buwenbuhuo.blog.csdn.net/
此篇为大家带来的是在IDEA上编写Spark程序的两种运行方式。


一. 编写 WordCount 程序
1. 创建 maven 项目, 导入依赖
- 1. 新建maven项目

- 2. 分组与名称

- 3. 存放位置

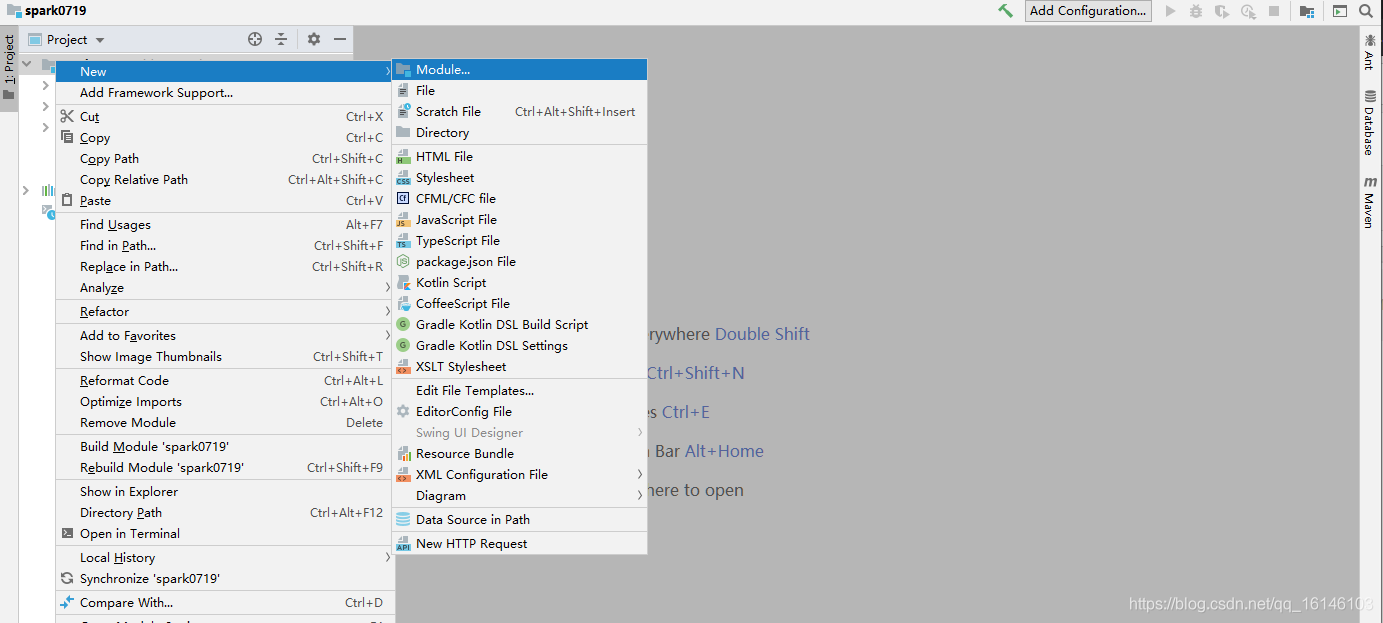
- 4. 新建一个maven子项目
为了方便管理,我们可以在母项目的基础上新建一个子项目


建立完成后 本身的src我们可以删掉

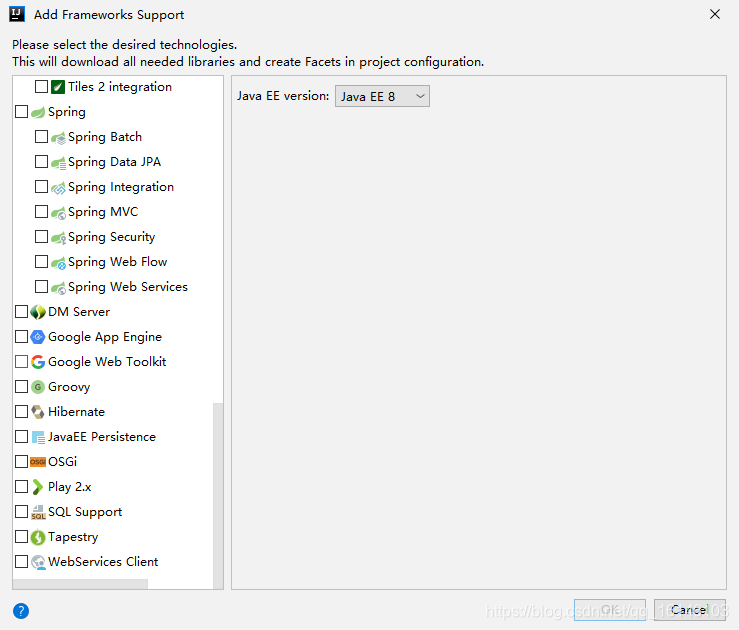
- 5. 粘贴依赖(内部
porm.xml)
依赖 我们可以选择外部的porm.xml也可以选择在内部的porm.xml
两者的对比:
- 选择外部的
porm.xml:优点:所有的项目都可使用。缺点:转移时依赖更换麻烦。 - 选择内部的
porm.xml:较外部好,但是每个子项目都要重新粘贴依赖。
<dependencies> <dependency> <groupId>org.apache.spark</groupId> <artifactId>spark-core_2.11</artifactId> <version>2.1.1</version> </dependency> </dependencies> <build> <plugins> <!-- 打包插件, 否则 scala 类不会编译并打包进去 --> <plugin> <groupId>net.alchim31.maven</groupId> <artifactId>scala-maven-plugin</artifactId> <version>3.4.6</version> <executions> <execution> <goals> <goal>compile</goal> <goal>testCompile</goal> </goals> </execution> </executions> </plugin> </plugins> </build>
- 1
- 2
- 3
- 4
- 5
- 6
- 7
- 8
- 9
- 10
- 11
- 12
- 13
- 14
- 15
- 16
- 17
- 18
- 19
- 20
- 21
- 22
- 23
- 24
- 25
- 26

- 6. 添加scala插件
由于已经添加过了,所以最后没有显示

2. 创建WordCount.scala
- 1. 创建com.buwenbuhuo.spark

- 2. 创建WordCount
package com.buwenbuhuo.spark
import org.apache.spark.{SparkConf, SparkContext}
/**
 **
@author 不温卜火
 **
 * @create 2020-07-19 14:26
 **
 * MyCSDN :https://buwenbuhuo.blog.csdn.net/
 */
object WordCount {
  def main(args: Array[String]): Unit = { // 1. 创建 SparkConf对象, 并设置 App名字 val conf: SparkConf = new SparkConf().setAppName("WordCount") // 2. 创建SparkContext对象 val sc = new SparkContext(conf) // 3. 使用sc创建RDD并执行相应的transformation和action sc.textFile("/input") .flatMap(_.split(" ")) .map((_, 1)) .reduceByKey(_ + _) .saveAsTextFile("/result") // 4. 关闭连接 sc.stop()
  }
}
- 1
- 2
- 3
- 4
- 5
- 6
- 7
- 8
- 9
- 10
- 11
- 12
- 13
- 14
- 15
- 16
- 17
- 18
- 19
- 20
- 21
- 22
- 23
- 24
- 25
- 26
- 27
- 28

二. 测试运行
1. 上传到Linux测试
- 1. 打包

如上图所示,如果继续使用maven打包的话,会很慢不方便。这时候我们需要用到的是jar包打包的方式 - 1.打包前的准备

- 2.选择所要打包的对象

- 3.仅保留两项即可

- 4.打包成功

- 5.测试在此只给出测试语句
上传到Linux中,之后使用下列语句进行测试
bin/spark-submit --class spark.WordCount --master yarn input/spark_test-1.0-SNAPSHOT.jar
- 1
2. idea 本地直接提交应用
package com.buwenbuhuo.spark
import org.apache.spark.rdd.RDD
import org.apache.spark.{SparkConf, SparkContext}
/**
 **
@author 不温卜火
 **
 * @create 2020-07-19 14:26
 **
 * MyCSDN :https://buwenbuhuo.blog.csdn.net/
 */
import org.apache.spark.{SparkConf, SparkContext}

object WordCount {
  def main(args: Array[String]): Unit = { // 1. 创建 SparkConf对象, 并设置 App名字, 并设置为 local 模式 val conf: SparkConf = new SparkConf().setAppName("WordCount").setMaster("local[*]") // 2. 创建SparkContext对象 val sc = new SparkContext(conf) // 3. 使用sc创建RDD并执行相应的transformation和action val lineRDD = sc.textFile(args(0)) val wordCount: Array[(String, Int)] =lineRDD.flatMap(_.split(" ")) .map((_, 1)) .reduceByKey(_ + _) .collect() wordCount.foreach(println) // 4. 关闭连接 sc.stop()
  }
}
- 1
- 2
- 3
- 4
- 5
- 6
- 7
- 8
- 9
- 10
- 11
- 12
- 13
- 14
- 15
- 16
- 17
- 18
- 19
- 20
- 21
- 22
- 23
- 24
- 25
- 26
- 27
- 28
- 29
- 30
- 31

现在如果直接跑程序的话,会出现一个报错

- 解决方法: 指定文件位置

- 2. 结果

本次的分享就到这里了,

好书不厌读百回,熟读课思子自知。而我想要成为全场最靓的仔,就必须坚持通过学习来获取更多知识,用知识改变命运,用博客见证成长,用行动证明我在努力。
如果我的博客对你有帮助、如果你喜欢我的博客内容,请“点赞” “评论”“收藏”一键三连哦!听说点赞的人运气不会太差,每一天都会元气满满呦!如果实在要白嫖的话,那祝你开心每一天,欢迎常来我博客看看。
码字不易,大家的支持就是我坚持下去的动力。点赞后不要忘了关注我哦!


文章来源: buwenbuhuo.blog.csdn.net,作者:不温卜火,版权归原作者所有,如需转载,请联系作者。
原文链接:buwenbuhuo.blog.csdn.net/article/details/107442234
- 点赞
- 收藏
- 关注作者


评论(0)